Last night was my first attempt at a "cut crease" look. I am not unhappy with the results perse, but the crease didn't end up as "cut" as I would like. I think part of the problem was that I didn't have the right tools, but of course I had never done it before, so I am bound to make mistakes! I did like the end result as long as you don't look too closely :p All in all, I would do this look again and I plan to perfect it until I get the results I want! Maybe I won't do this particular colour scheme again, but I really love the cut crease look and I want to add it to my skill arsenal as a makeup artist!
I'm sure by now you've all figured out that I love collages of looks. I think it just gives a better overall feel of the look when you can see it all at once, including all the closeups.
For this look, I applied my foundation, concealer, brows, highlight, blush, and bronzer as usual, except I used a paler lavender-pink blush to compliment my colour choices.
Since I had never attempted a cut crease before, I decided to see if I could do it without any sort of instruction. First I applied eyeshadow primer, then the NYX Jumbo Eyeshadow Pencil in Milk as a base, and then I cut my crease with Tarina Tarantino Purple Pencil Eyeliner (discontinued), but any longwear purple eyeliner would do.
Next I started to fill in a dark purple shadow from the drawn crease upward. I used "Purple Rain" from the Sephora Collection Colorful Eyeshadow line. I then blended the purple out with a medium grey to add depth and highlighted under my brow and in my tear duct with a shimmery nude.
Next came the tricky part. I realized I didn't have any proper glitter adhesive, so I used a glitter liner to fill in my lid and sweep out from my outer corner. While it was still wet, I applied NYX loose gold glitter so it would stay. I seem to have misplaced the brush I usually use to apply glitter, so I used the tip of my pinky finger (I think this is why my crease did not end up as "cut" as I would have liked. After the glitter dried, I used the Dior Art Pen in Black to draw the upper lid liner. I tightlined my upper lashes with black pencil and rimmed my lower lid with the NYX Milk Pencil. (See how the crease isn't "cut"? One day soon it will be!)
Following the line I had made with NYX Milk, I used the same purple eyeshadow used on my lid to colour my lower lashline; I took it out passed the end of the black liquid liner. I then lined my lower waterline with the NYX Milk Pencil to make my eyes look a smidge bigger. Next came mascara! I use the Diorshow Maximizer as a base and the Diorshow Iconic Overcurl on top. I used the Diorshow Maximizer on my bottom lashes as well and then the Anastasia Beverly Hills Hypercolor Brow and Last Tint "In the Pink" over top to really make the colour pop! (my camera is crappy so you can hardly see it, but in real life it looks really bright!)
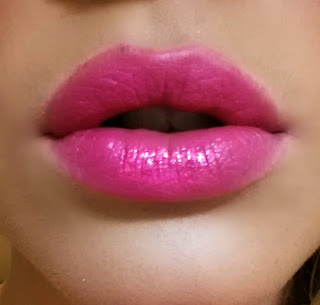
I used Sephora Rouge Shine No. 18 on the lips (after lining and priming of course!) and dabbed a little electric pink shadow from the Sleek Acid Palette over top to give it a bit more colour, since the Rouge Shine line is fairly sheer. I could have also gone with MAC Rebel lipstick, a deep purple, but I decided the brighter the better!
Like I said before, practice makes perfect. This being my first time with this kind of look, it is obviously not perfect! I am quite happy with how it turned out considering my lack of experience with it, but stay tuned to see me perfect it! I know this is not a "pictorial", but I will be doing those soon! If there is anything you guys want to see particularly, please leave it in the comments section! Alternately, if there are any specific looks you want me to do, please let me know! Have a great day, my lovelies!
Make-Up, not War,
Rain xoxo


No comments:
Post a Comment